

What Is In The Cleaning Solution For An Epson Printer Print Head
About Epson printers take a permanent printhead. A permanent printhead has better quality and durability than a ane-time-use printhead. Notwithstanding, the permanent printhead becomes a major trouble when it is chock-full. For the owners of Epson printers, there may be a day that we notice the printer prints in stripes. Most people will blame the poor print on 3rd party cartridges, ink quality, ink type switching, and so on. As an attempt to solve the trouble, a person may switch back to an Epson cartridge. If the new Epson cartridge fixes the trouble, the person would conclude that he or she should stay with Epson. If a new Epson cartridge didn't set the problem, the person would conclude that the refilling process broke the printer.
To empathize why Epson printers are so easy to clog and why sometimes a new cartridge volition solve the problem, we demand to understand the mechanisms backside clogging. There are iii kinds of bottleneck:
- Bottleneck caused by debris, fibers, and other strange objects
- Bottleneck acquired by stale inks
- Bottleneck caused past air bubbling
The air bubble is the most common clog. The bubble can form when y'all are switching to a new ink, changing a cartridge, or experiencing room temperature fluctuation. It can also occur due to no reason at all.
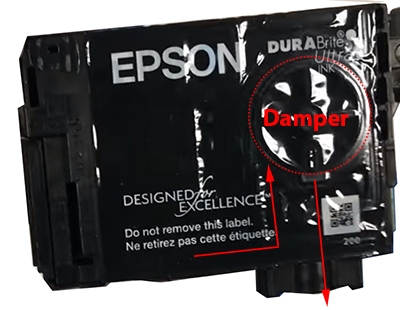
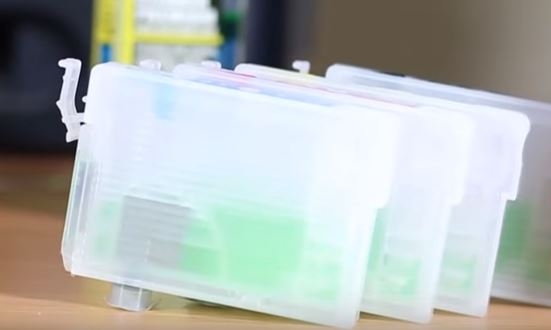
Allow's explain why Epson's cartridges seem less likely to clog than a refilled Epson cartridge. Epson cartridge has a built-in damper (Picture). The damper forces ink to flow ane manner only: from the cartridge to the damper so from the damper to the outside. For a new Epson cartridge, the damper should be full of ink and thus less probable to have bubbles. Nonetheless, about people use the cartridge until they see that a color runs out. By this time, the ink is depleted, and the damper is full of air. Once we refill the cartridge, the air in the damper can clog the printer. We recommend using a syringe to suck air from the cartridge ink outlet after each refill. Consequently, we will remove the air bubbling from the damper.
Some other identify that air bubbles can form is inside the printhead. We volition take a closer look at where the cartridge feeds ink. At that place are minor cone-shaped ink tubes (ink intake) on top of the printhead. When we change the cartridge, we may push some air into these intakes and create bubbles. This is why printers tend to clog right later on a cartridge alter.
To deal with the air bubbles, many HP and Catechism printers take built-in pumps. For example, an HP printer pumps air into an internal float, which squeezes ink out of the cartridge, and therefore flushes the air bubbling (or clay) out of the printhead. On the contrary, Epson relies on two things: 1) an internal one-way damper that makes ink flow one-style simply. ii) a built-in cleaning function which uses an external waste product pad to suck and wipe the printhead. Each built-in cleaning bicycle will remove some ink out of the cartridge and so dump the ink on a waste product pad. However, the waste pad is poorly designed and often experiences inundation. In one case the inkpad overflows, ink volition remain on the printhead and dry. The dried ink will create more bottleneck and make things worse. Thus, we do not recommend doing more three head cleanings in a row.
Nosotros can illustrate the to a higher place scenario with an example. Our printer is missing a colour (clogged past air bubbling). We did 7-8 built-in cleanings continuously and got it to piece of work correctly. The bubbles were sucked out with ink, and we got dorsum to regular printing. A solar day later, we found the printer was clogged once again. Although the cartridge didn't have any air bubbles, the printhead was clogged past dried ink.
If yous search the word "Epson unclog" on YouTube, you can encounter almost people simulating HP's method. They inject fluid from the ink intake and collect waste matter ink with a paper towel underneath. Yet, this is a little bit of overkill for most clogs. Hither at BCH, we perform this sequence, gradually increasing the effort and intensity of unclogging until a satisfactory result is reached.
Prevention
The best unclogging techniques are to outset with prevention
Do not permit the ink go depleted. If we let the ink to become exhausted, then both the cartridge and the printhead will be full of air. When we refill a cartridge, we will use a syringe to suck the air from a cartridge's outlet until nosotros see ink coming out. Likewise, we may add a drop (1 ml) of Wetter Solution to each 100 ml ink to prevent it from drying
BCH Wetter Solution
Congenital-In Cleaning Function
Epson'due south self-cleaning is the most under-estimated and misunderstood method. Actually, Epson built a very powerful cleaning routine in the printer, just people don't know how to utilize it. Well-nigh people only run one or ii cleanings and surrender. People worries that the cleaning will damage the printhead. Epson has a counter, that if we run more 5 cleanings in a row, the printer will display "the printhead is damaged" and prevents from farther cleaning. Therefore, we will never run more than three cleanings consecutively. We volition run three cleanings, go to home screen (don't demand to wait), and then go to maintenance tab and do the next batch of cleanings.
The following video shows how it is done, properly.
We will run the built-in "make clean printhead" iii times, then become to printer's home screen, then back to the maintenance screen and run three more times. Afterward, we wait 12 hours, so run 6 more times (3+3). We usually repeat the procedure three times before giving up on this method. If the technique works, we will clean the ink pad to prevent ink from drying on the printhead.
How to clean waste material ink pads?
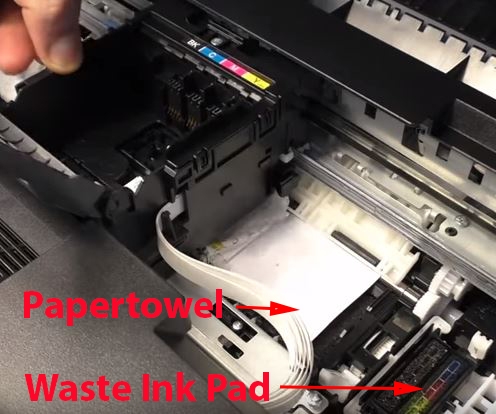
We will plough on the printer. The printer volition unlock the printhead and let it motility freely. Earlier the printer locks the printhead again, nosotros will unplug the power cord. Thus, we can move the printhead abroad from its resting position. And then nosotros will be able to see the exposed waste product ink pad. We will use a newspaper towel to suck up the excessive waste product ink and and so power on the printer.
Positive Force per unit area - Cartridge
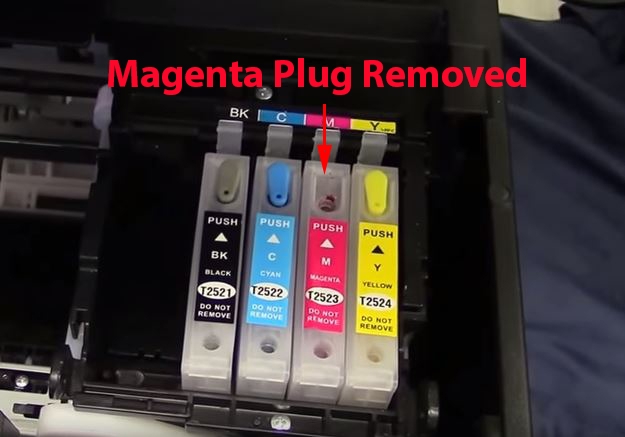
Slight positive force per unit area will wash out the air bubbles also. If we have a refillable cartridge, we will unplug the refill pigsty. Once the superlative of a cartridge is open to the air, at that place will be slight pressure to push the ink down and motility air bubbles up. For refilled OEM cartridges, nosotros will skin off the sealing tape and expose the drill hole. These methods create a trivial downward pressure on the cartridge. We will go out the cartridge in the printer overnight. We volition check the outcome a twenty-four hour period subsequently and run across if nosotros need to move on to the next step. Furthermore, we will clean the waste product ink pad afterwards.
Positive Pressure - Titration
Nosotros can also employ ink tubes to generate positive pressure. This kit (click here) consists of two tubes. These ii unlike bore tubes (1 ft each) tin be cut and fastened to each other. If we have 4 colors, nosotros will cut each into 4 pieces, then connect to each other. The smaller tube will exist attached to the ink intake and we can add cleaning solution to the larger tube. We and then allow the earth gravity to practise the cleaning. The cleaning solution will gradually dissolve the clog and button open up the nozzles. Once we run into the cleaning solution is gone, we know the cleaning is completed. This video shows the process in action.
A less aggressive style of flushing the printhead
Moisture Towel Method
If we decide the clog is due to dried ink, nosotros can use a wet towel to soften the dried ink. We volition unplug the printer while the printhead is unlocked, similar to the procedure in (two). We will put a wet paper towel, soaked with hot water or cleaning solutions (LINK), in the middle of the printer. And so nosotros will slide the printhead over the towel and allow the printhead sit on peak of the canvass for a few hours.
Printhead Flushing - Syringe
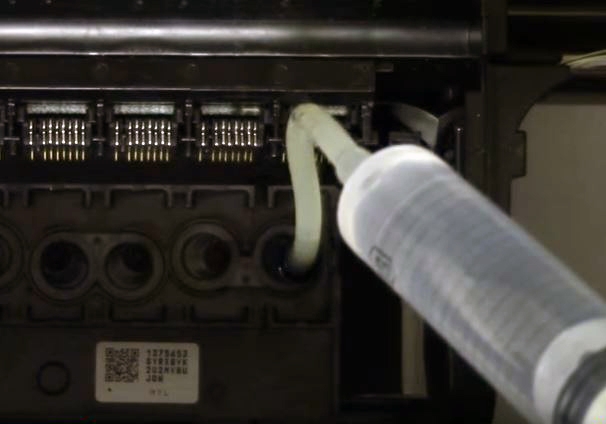
If we make a more rigorous attempt, we can remove the air bubbles and debris in the printhead by flushing it with liquid. We will have a syringe, fill it with liquid, and push button the fluid through the cone-shaped ink intake. Some ink intakes fit a syringe, so we may not need special tools. A larger intake may need a tube to connect with the syringe.
If your printer'southward ink intake are "nipples", you can use this syringe: Size-Southward Syringe.
This method will flood the waste material ink pad. Consequently, nosotros will put a dry paper towel in the printer and slide the printhead on top of it, every bit in 4).
What liquid should we use?
Ink. The original ink is the nigh non-intrusive manner. A "aureate rule" in the ink industry says the dried ink must be able to be dissolved by the same ink. So the best solution is to use the same kind of ink in the cartridge.
Ink Base of operations. The ink base is the liquid for making the ink before adding colorant. The ink base is a kind of ink without color. The ink base of operations is less messy and not-intrusive to the printhead. BCH produces two kinds of ink base: dye base and paint base.
Warm h2o. Water is the cheapest solution. However, the printer cannot print on h2o, and we should flush information technology with a little ink later.
Cleaning Solutions. Cleaning Solution is used for stubborn clogs. The cleaning solution can add extra push if other liquids have failed.
Printhead Flushing - Cartridge
We can likewise take a ready of refillable cartridges and fill them with cleaning solutions. Some people sell these as "cleaning cartridges".
Professional Cleaning
If the printhead flushing is non working, we may take the printhead out and clean it. Nosotros showtime by searching "remove xxx printhead" on YouTube. After we find a way to remove the printhead, we volition have the printhead out.
Outset, we soak the printhead in cleaning solutions for a few hours. And so, we will use a high-force per unit area steamer to open up the nozzles and blow abroad droppings. Finally, we will utilise an ultrasonic cleaner to remove clogging particles and stale ink.
This procedure should be done past professionals. Nosotros may lose a printhead this style. Equally a reference, we have a link here:
Videos:
Unclog Epson Artisan 1430
WF-3620 Won't Recognize Cartridge & Clogged
Unclog WF-3640
Jan 21st 2019

Source: https://bchtechnologies.com/blog/how-to-fix-blocked-or-clogged-epson-printhead-nozzles-cleaning-and-unclogging-tips/
Posted by: jacksoninswer.blogspot.com
0 Response to "What Is In The Cleaning Solution For An Epson Printer Print Head"
Post a Comment